A Complete Guide to VS Code Extension Testing
Most VS Code extensions in the marketplace have minimal testing, if any at all. The official VS Code documentation recommends using packages like @vscode/test-electron and @vscode/test-web which provide limited testing capabilities and a total lack of support for testing webviews. Although webviews may not be the recommended approach to building extension UI, it’s an integral part of the UX surface area in many extensions and has some pretty compelling use cases. With VS Code extensions establishing themselves as critical building blocks in the developer experience, it’s important that extension authors ensure continued quality and continuity in this complex and ever changing ecosystem.
The original version of this blog post was posted on the Stateful blog.
I recommend common testing principles as mentioned in The Practical Test Pyramid, where the low hanging fruit and majority of tests are unit tests. Unit tests have the advantage of checking code in isolation, which avoids dependencies specific to VS Code and allows the tests to easily run across environments. The next level in the pyramid is integration testing, which introduces complexity by requiring tests to interact with the VS Code API or the application itself.
At this point you might ask yourself: “Why should I be testing VS Code? Isn’t that the job of Microsoft”.
The answer is both, yes and no! A common misconception is that if extension developers use the VS Code API correctly, the extension will “just work”™. Unfortunately, the reality is that bugs will still happen (even if you use TypeScript) and may not even be caused by your extension - but still need to be uncovered and dealt with. As your extension grows in complexity (and popularity!), the time required for manual validation quickly becomes unrealistic. Simple changes like a missing contribution property in package.json or a silently broken event listener can fail a popular workflow, causing confusion, frustration and ultimately diminish trust and adoption.
I recommend that you make a small investment and create some end-to-end (e2e) tests! They can detect and alert you of configuration or API changes that might break your extension. Using WebdriverIO (and its new VS Code integration) you can automate VS Code like any other Electron or web application (not to mention the comprehensive functionality outlined below).
The WebdriverIO VS Code service helps:
- 🏗️ Installing VS Code (either stable, insiders or a specified version)
- ⬇️ Downloading Chromedriver specific to given VS Code version
- 🚀 Enabling access to the VS Code API from your tests
- 🖥️ Starting VS Code with custom user settings (including support for VS Code on Ubuntu, MacOS and Windows)
- 🌐 Serving VS Code from a server to be accessed by any browser for testing web extensions
- 📔 Bootstrapping page objects with locators matching your VS Code version
Make life easier and run both unit and integration tests, access the VS Code API’s and automate complex user flows or webviews using one test framework.
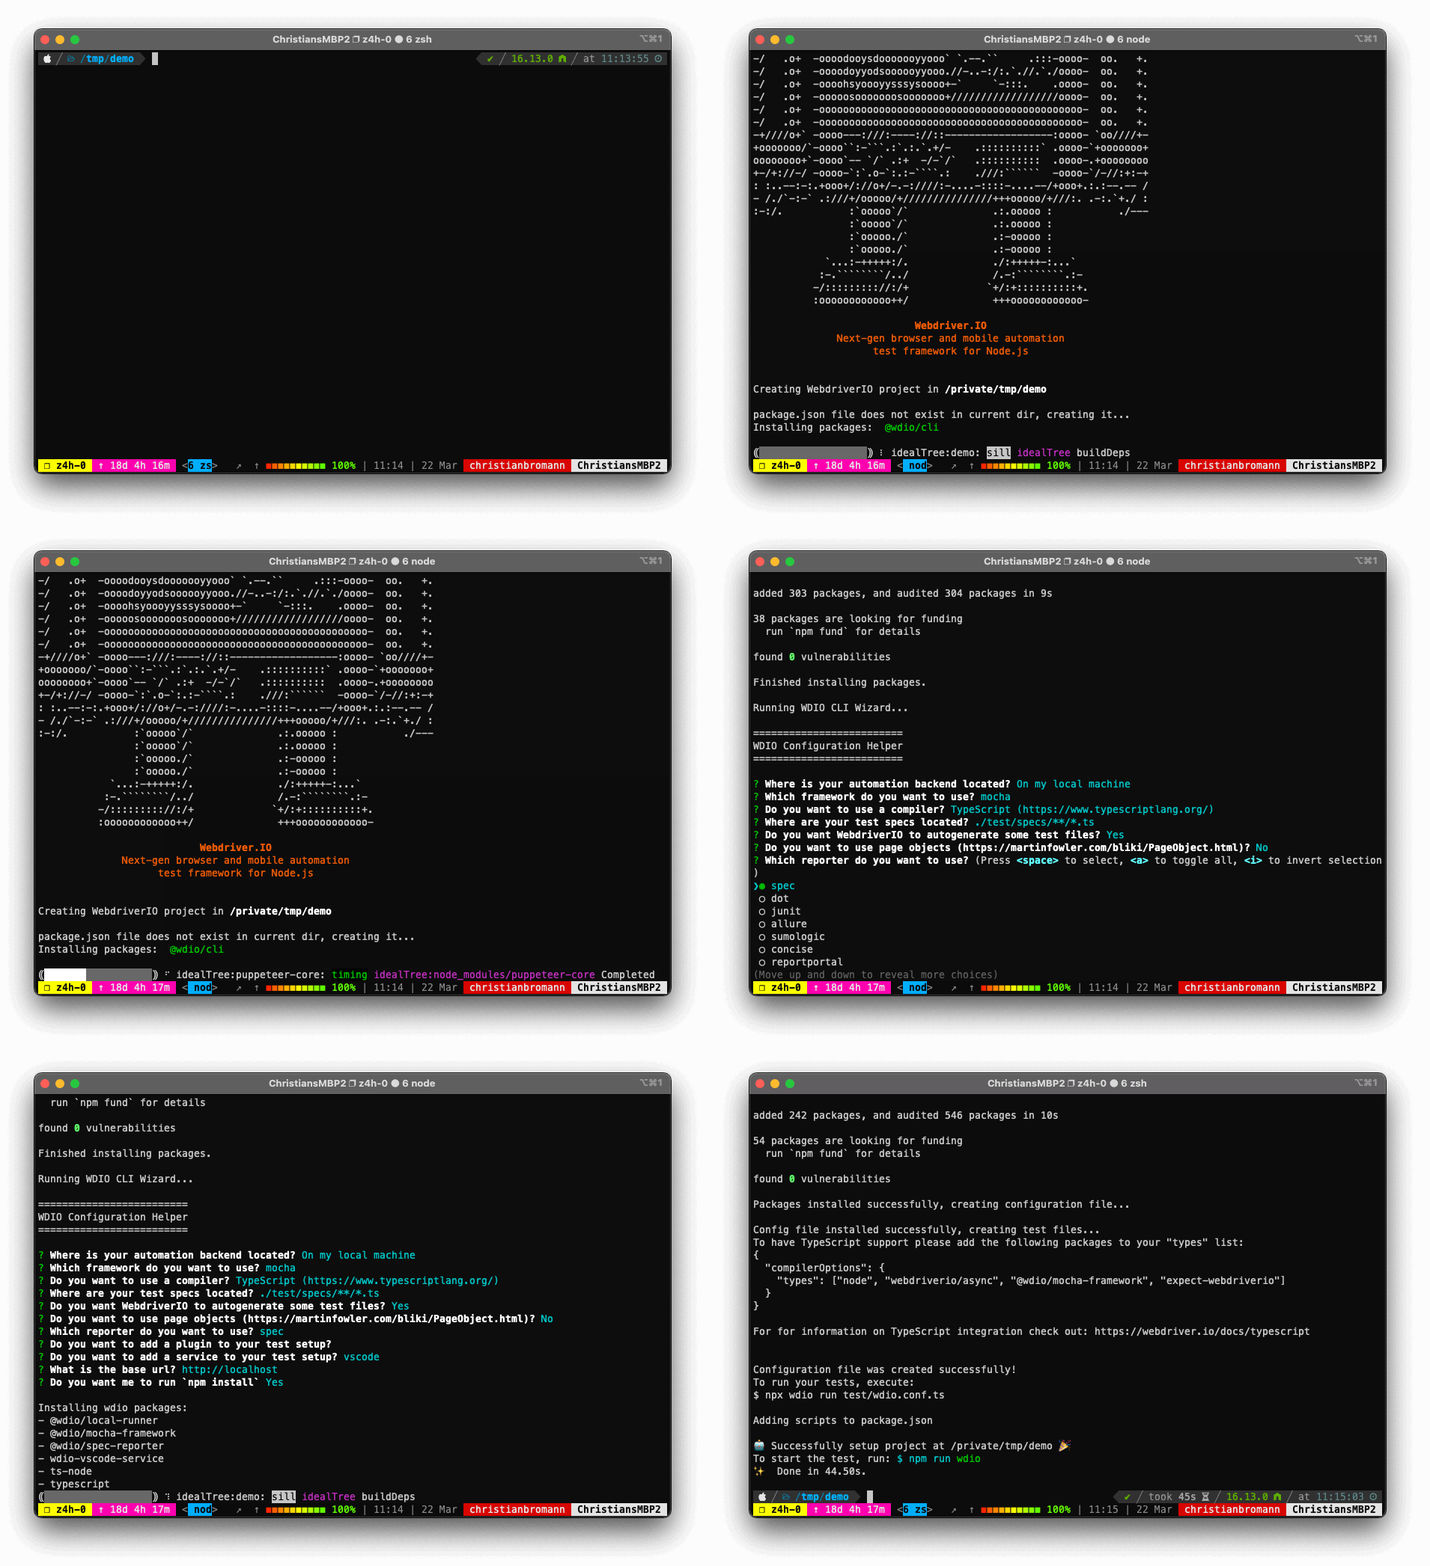
To start testing your extension project using WebdriverIO, setup your project by running:
npm create wdio ./
An installation wizard will guide you through the process. Ensure you select TypeScript as compiler and decline the page objects (batteries already included). Then make sure to select vscode within the list of services:

After the wizard has installed all required NPM packages, you should see a wdio.conf.ts in the root directory of your project. Open the file and update the capabilities property to this:
import path from 'path'

// test/wdio.conf.ts
export const config = {
    // ...
    capabilities: [{
        browserName: 'vscode',
        browserVersion: 'stable',
        'wdio:vscodeOptions': {
            // point to the root directory of your project
            extensionPath: path.join(__dirname, '..'),
        }
    }],
    // ...
};
This will instruct WebdriverIO to download and set up VS Code stable for you. You can also choose any arbitrary version VS Code has ever released or insiders for that matter. Lastly, let’s create a demo test to showcase how to print the application title, e.g.:
// test/specs/demo.test.ts
describe('My VS Code Extension', () => {
    it('should be able to load VS Code', async () => {
        const workbench = await browser.getWorkbench()
        expect(await workbench.getTitleBar().getTitle())
            .toBe('[Extension Development Host] Visual Studio Code')
    })
})
Now you can run your tests by calling:
npx wdio run ./test/wdio.conf.ts
Awesome 🎉 Your first demo test just successfully passed. I have prepared a detailed tutorial on testing a concrete extension from the VS Code Marketplace in the guide on testing extensions. Some very successful extensions like the VS Code Live Server are already using this set-up successfully.
If you have any questions or problems getting started writing tests for your extension, join our Discord and I can help you out!